WebSiteAdmin version 4 - installation instructions and manual
1. Installing the website
2. Configuring the website
2.1. Configuration file
2.2. Configuration options
3. Administration panel
3.1. General overview
3.2. Main pages in the administration panel
4. Website structure and content management
4.1. Structure management, adding new pages
4.2. Modifying the content of the pages
4.3. Website navigation menu
4.4. Custom server side forms
4.5. Languages and language files
5. Front site templates management
5.1. Templates overview
5.2. Adding new templates and modifying the existing ones
5.3. Custom HTML tags
5.4. Adding Google AdSense advertisements or Google Analytics
6. Administration panel users and groups
6.1. User groups
6.2. Adding new users
6.3. Permissions management
1. Installing the website
You may find below information about the WebSiteAdmin integrated setup, the description of all the steps, possible errors and troubleshooting information.
Please note that we offer free installation for all our products, so in a case you prefer that we do the installation for you, you are welcome to contact our support team and we'll try to help asap.
Step 1 - Welcome screen and WebSiteAdmin End User License Agreement
In this first step you'll be able to:
see the general setup welcome message
read the WebSiteAdmin end user license agreement
In order to continue to the next step, you'll have to agree with the WebSiteAdmin end user license agreement by checking the check box ("I agree ...").
Troubleshooting
I can't find the Continue button and I can't proceed to the next step?
By default the Continue button in this step is hidden and it becomes visible when you click on the check box ("I agree ..."). If you don't agree with the WebSiteAdmin end user license agreement, the Continue button will not show up and you'll not be able to proceed to the next step.
Step 2 - MySQL server information
In this step you'll have to provide the access information for the MySQL server (server name, MySQL user and password) on which you would like to install the main WebSiteAdmin database. The setup needs this information in order to connect to your server and install the MySQL database on it.
In this step, you'll be asked for:
MySQL Server - the server where you plan to install the database, usually "localhost" for most of the hosting packages.
Please note that on some hosting companies like GoDaddy, the MySQL server name is specific for every database, which is created and looks like for example: db_name.db.11111.hostedresource.com
In such cases it's necessary to copy and paste the exact server name, which you may get from the hosting package control panel.
MySQL User and MySQL Password - a valid user account for the MySQL Server
Please note on CPanel hosting package (used by the most popular hosting companies like HostGator, BlueHost, HostMonster, CirtexHosting etc.) if you create a new database and MySQL User you need to explicitly give permissions to this user for the database you created - you can do that from the MySQL Database page in CPanel, at the bottom.
If you are not sure for these settings, please contact your hosting provider or log in to your hosting package control panel, where usually this information can be found on a page called "MySQL" or "Databases".
After you enter these values and click on the Continue button, the setup will try to connect to the MySQL server with the user name and password you entered. If any of values aren't correct (the address of the MySQL server or the MySQL user name and password), then an error message will be displayed and you won't be able to continue until you enter the correct values.
Troubleshooting
After you click the Continue button you receive an error message in red saying "Server doesn't exist or access is denied".
If this is the case, please check once again the values you have entered. If the problem persists:
make sure that your MySQL server is up and running and that this account is valid
make sure also you enter a correct MySQL server name (on companies like GoDaddy and 1&1 the name isn't the default "localhost" and may be different for every database)
on CPanel hosting packages, please check if permissions for the database are granted to the MySQL user you entered
- if you have any troubles finding the correct MySQL information for your hosting package, you can also contact your hosting provider and ask them for the MySQL settings for your hosting account
Step 3 - Setup of the main WebSiteAdmin database
In this step you'll be asked if you would like to create a new database for WebSiteAdmin or use an existing one.
If you choose the option to create a new database, you'll be asked to enter the name of the database. We recommend you to use a name, which will be easy to distinguish, like for example classified_ads. Be aware that when choosing this option, the MySQL user you have provided in the previous step should have the rights to create new databases on the MySQL server. If this is not the case, the database creation will fail and such error will be displayed on the screen.
If you choose the option to use an existent database, the WebSiteAdmin database tables will be created in the database chosen by you. All the tables, which will be created will have a prefix "websiteadmin_", no data from the existing database and tables will be deleted.
Troubleshooting
I have chosen the option to create a new database but when I click on Continue, I get an error message colored in red and I can't proceed to the next step, why?
- make sure that your MySQL user has "CREATE DATABASE" permissions on the MySQL server
- make sure that you don't have already a database on your server with the same name as the one you entered
I have tried to use the second option, to use an existing database, but I receive an error message saying that the table "websiteadmin_admin_users" already exists
- this means that you have previously installed the script in this database, so you may either use a new database or delete the old script tables and then continue with the installation
Be aware that in this step the setup creates also the script configuration file. If the process running PHP on your server for your hosting package doesn't have right permissions in the folder where you install WebSiteAdmin you'll receive the following message in the interface:
The process running PHP on this computer doesn't have permissions to create and write the configuration file in the main web folder. You need to create it manually - the content will show up in the screen. You need to copy / paste it in a file "config.php" and upload it in the main web folder (the one in which you uploaded the real estate files). So you could either upload it with FTP or use the File Manager in your hosting package control panel to save the config.php file.
If you experience troubles when doing this or have any additional questions, please don't hesitate to contact us.
Step 4 - Installation successful screen
If you reached this step, WebSiteAdmin has been installed successfully on your server/hosting package and you can open the front site and also the administration panel to manage the website and different settings.
2. Configuring the website
2.1. Configuration file
The configuration file config.php is located in the main folder in which the software is installed and contains some installation settings like the MySQL server user name and password. This file is created during the initial installation and the settings in it rarely need to be modified, unless for example moving the website to a different hosting package, changing the installation folder or debugging the script to find possible issues with the installation and php files.
The default configuration file contains the options described below.
Domain name
$DOMAIN_NAME="www.domain.com";
This is the main domain on which the script is installed - please note, if the script is installed in a sub folder, the sub folder name should be added to the domain name, for example:
$DOMAIN_NAME="www.domain.com/sub_folder";
This domain name is used when forming the SEO URLs (if the option is activated from the Configuration Options page in the admin panel), so having a wrong domain or URL not containing the sub folder name, will result in wrong (not working) links on the front site
MySQL server, user name, password and tables prefix
//MYSQL SETTINGS
$DBHost="localhost";
$DBUser="the_mysql_user";
$DBPass="the_mysql_password";
$DBName="the_database_name";
$DBprefix="websiteadmin_";
This section in the configuration file is created when running the setup, it has the MySQL server, MySQL user name and password used by the script to connection make queries in the MySQL database. Please note that these MySQL settings need to be modified only if your MySQL server information has changed, for example when moving your website to a different hosting package.
Debug mode
$DEBUG_MODE=false;
By default the script is configured to not show any runtime errors or warnings (if any) for security reasons. Usually when developing custom extensions or making modifications in the default sources, it may be useful to turn on this option in order to see the possible errors and make the development process easier.
Languages available in the administration panel
$AdminPanelLanguages=
array
(
array("English","en")
);
By modifying the value of this array, it's possible to configure the languages, which will be available in the administration panel. For example the following:
array
(
array("English","en"),
array("Español","es"),
);
will enable the English and Spanish languages in the administration panel.
Please note that prior to enabling a language in the administration panel, it's necessary to upload the translated language file for it in the /ADMIN folder. For example if the language is German (Deutsch) with language code "de", then it's necessary to upload a file texts_de.php with the German translation in the /ADMIN folder (/ADMIN/texts_de.php).
Please don't hesitate to contact us for any questions related to the language files translation and ready translations available for download.
2.2. Configuration options
The Settings->Configuration options in the administration panel provides functionality to change the different options on the front site. You may find below a list and description of the different configuration options.
Enable SEO URLs
The search engines optimized urls look like static html pages and have keywords in the url (which allows better indexing by search engines like Google).
In order to use the SEO links, the system will require the presence of the mod_rewrite module (for Linux / Apche or isapi_rewrite for Windows / IIS). If this module is not present on your server or hosting package, you could deactivate this feature by setting it to NO.
System Email Address
You can set with it the system email address, which will appear as sender of the system emails sent by the website (like the email when the listings are approved etc.).
System Email From Field
The name of the sender of the system email address, which is used when sending email notifications, welcome emails and others to the users.
Use CAPTCHA images to prevent spamming
A good way to avoid automatic form submissions when creating a web form is to add some kind of verification. One of the best ways is to use an image verification, called also captcha. What it does is to dynamically create an image with a random string displayed on it. Then visitor is asked to type that string in a text field and once the form is submitted it checks if the string on the image matches the one inputted by the user.
The usage of the captcha images is enabled by default, but if you would like to disable it (for example if the PHP graphics library - GD isn't installed on your website), you could change the value of this setting to "NO".
Website time zone
With this setting you can change the default time zone on the website. The time zone coming by default for most of the downloads is Europe/London.
List of the supported time zones can be found on: http://www.php.net/manual/en/timezones.php
Some examples of supported time zones are:
America/Buenos_Aires
America/Chicago
America/Los_Angeles
America/Mexico_City
America/New_York
Asia/Singapore
Asia/Tokyo
Europe/Berlin
Europe/Madrid
Europe/Moscow
Europe/Zurich
…
Website date format string
By entering a valid PHP date format string, you can change the format of the date displayed on the website.
Full information on the supported date format strings can be found on:
http://www.php.net/manual/en/function.date.php
Here are a few examples:
"F j, Y, g:i a" // March 10, 2001, 5:16 pm
"m.d.y" // 03.10.01
"j, n, Y" // 10, 3, 2001
"H:i:s" // 17:16:18
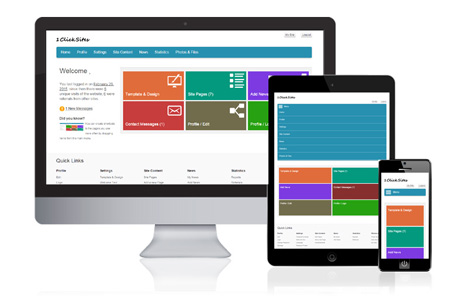
3. Administration panel
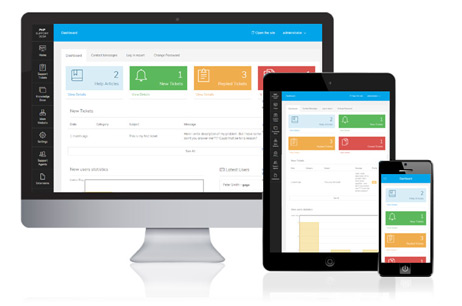
The administration panel is the main tool to be used to manage the website, pages content and different settings.
It has Standard view (version optimized for computers and larger screens) - you may see it to the left and also Mobile view (optimized for mobile devices and small screens) - you can see it to the right.
3.1. General overview
The administration panel is the main tool available to the WebSiteAdmin administrator to manage the website, change its settings, templates and design, pages content etc.
The features in the admin panel are divided in categories. The main administrator and the members of the Administrators group have access to all the categories and pages in them.
The WebSiteAdmin administration panel functionality is divided in 8 categorie / menus in the main start menu:
- Home (welcome / dashboard page, modification of password, log in report)
- Website (front site structure and content management, navigation menu settings)
- Extensions (custom extensions and extension files and different modules)
- Templates (front site templates management)
- Statistics (reports and referrals for the website visits)
- Users (management of the administration panel users, groups and permissions)
- Settings (management of the categories and language versions)
3.2. Main pages in the administration panel
You may find below a quick overview and brief information about the most used pages in the administration panel and functionality on it.
Home → Welcome
The Welcome page in the administration panel provides quick information about the last log in and the pages on the website, as well as links to the main pages in the administration panel for easier navigation.
Home → Log in Report
The log in report shows a log of the administration panel log in attempts - the successful and failed log ins with their date and IP address.
Home → Change Password
This page can be used to change the password of the user for the administration panel. To change the password it's necessary to enter the old password and the new one and confirm it - after the password is changed successfully, the user will be logged out and asked to log in again with his new password.
Website → Management
This is the main page to be used to manage the website structure and content - add new pages, remove or rename the current ones, modify the pages content, the page title meta keywords or meta description or set custom php extension to be executed for a page.
Website → Navigation Menu
Modifying the menu item template from this page can be useful when customizing the website look and feel or when integrating a custom design / front site template.
Website → Manage the forms
The custom server side forms can be useful if you would like to create custom contact or feedback forms or any other type of forms to get information or inquiries from the users. When creating a new form you can add in it the fields you prefer - it's possible to create text fields and drop down menus by entering the possible values for them.
The data sent by the users can be seen from the administration panel and / or to be forwarded to an email address set by the administrator (the email address and message that will be shown on successful form submission can be set when clicking on the Settings icon for a selected form).
Website → Posted Data
The page shows the data posted by the users from the custom server side forms (like the Contact form on the website). You can also choose this data to be forwarded to an email address you prefer, from the Settings page of the form.
Extensions → Files
The page shows the current files in the /extensions folder, which can be used for extensions of the pages or custom tags. Please note that files that should be used for custom tags have _tag at the end of their name. A file can be set to be executed as extension for a page from the Website → Management page and for a tag from Extensions → Tags
Extensions → Tags
You can use this page to see the current tags, delete any of them or add new tag. Please check the chapter "Custom Tags" to read more about their usage and functionality.
Extensions → News, Extensions → FAQ Manager, Extensions → Newsletter
These are some basic WebSiteAdmin modules loaded by default allowing to post news on the website, create a page with frequently asked questions and send newsletter to the users who have subscribed for it.
Templates → Modify, Templates-> Select a Template, Templates → Add a New Template
These pages can be used to modify the front site template, select a different template or add a new template by pasting its HTML code.
For more information about the templates and their structure, please check the section "Templates Management' in this manual.
Statistics → Reports
The page shows brief information about the website visits and also displays a chart for them.
Please note that the integrated website visits tracking and statistics information is basic and simple, for more advanced tracking and information, we recommend using an external system such as Google Analytics, which can be easily added on the website.
Statistics → Referrals
You can see on this page the last referrals, so you can easily track who is linking to your website and from where the traffic to your website comes from.