
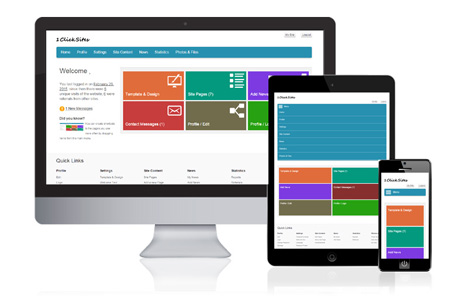
1. General overview of the vendors admin space, navigation menu and links
2. Profile management
2.1. Modifying the profile information
2.2. Store packages
2.3. Changing your password and log in report
3. Products management
3.1. Product categories
3.2. Products management
3.3. Product options
3.4. Making a product featured
3.5. Shipping zones and shipping costs
3.6. Taxes
3.7. Product reviews
4. Orders management
4.1. Orders approval
4.2. Customer loyalty program
5. Store settings
5.1. Payment settings
5.2. Invoices settings
5.3. Website style
5.4. Products, menu and search settings
6. Website structure and content management
6.1. Managing the structure and content of the pages of your website
6.2. Changing the style of your website main navigation menu
6.3. Adding news on your website
7. Templates
7.1. Selecting a different predefined template for your store
7.2. Editing the HTML code of your template
7.3. Product categories menu template
8. Tools and statistics
8.1. Adding new forms
8.2. Publishing the forms on a page
8.3. Website statistics and referrals
1. General overview of the vendors admin space, navigation menu and links
The pages and functionality in the vendors admin space allow you to manage your website / store, edit its pages, add products, change the settings, manage your profile etc.
The functionality is divided in groups and pages. To navigate to the different pages, you can use the main navigation menu to the left or use the quick page links on the home page.
Pointing the mouse over a main page in the navigation menu will show its sub pages. The main pages in the admin panel are:
Home (quick links to the other pages, dashboard, functionality to change the store package and the password)
Products (categories and products management, shipping zones and taxes, product reviews)
Orders (orders management and approval, customer loyalty program, statistics )
Settings (payment, orders, invoices and other settings)
Website (management of the pages of the website / store adding new pages or removing the existing ones, modify the content of the pages, add news on the website)
Templates (select a different template for the store, modify the current template)
Tools (create new custom forms, see posted data on the forms, image manager)
Statistics (general statistics for the website visits, submit pages to Google)
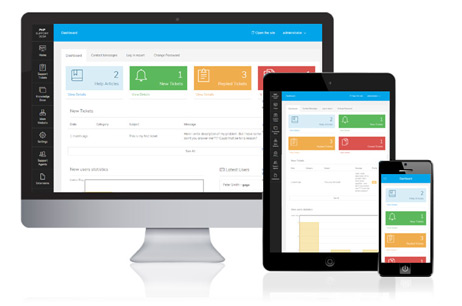
When you log in, on the home page you can find a dashboard having the most frequently used links (like the ones to manage the store structure and template), functionality for adding new products and others.
At the top left corner of the dashboard in the Right Now section, you can see quick statistics information for the new orders, current number of products, pages and news with links to edit them.
Under the Right Now section, a list with the recently added products (with their picture and name) shows up when clicking on the product picture, you are redirected to the product modify page on which you could make changes in the selected product. The dashboard has also links to modify the current template and pages.
At the right column at the top, there is a form for adding new products select the product category, click Continue and you'll be redirected to the page for entering the product information. The last section of the dashboard is the Recent Reviews section at the bottom right corner, which shows the recently posted reviews for your products.
You can switch the content of the home page between DASHBOARD and QUICK PAGE LINKS by clicking on the link at the top right corner. The Dashboard has the sections described above, while the Quick page links has
links to the main pages of the admin panel grouped in categories.
At the top of the vendors admin panel , you may find also the following links:
Home (allows to navigate to the home page of the vendors admin panel)
My Store (clicking on this link will open your store)
Main Website (this link leads to the home page of the main mall website)
Log out (allows you to log out and quit the vendors admin panel)
2. Profile management
2.1. Modifying the profile information
From the Home->Profile page, you can modify your profile information edit the information you entered during the registration, choose the currency displayed on your store, upload your store logo and others.
The fields on this page are:
Username (this is your store / user name, which can be modified only by the administrator)
Phone (your phone number)
Email address (your registered email address)
First Name (first name of the store owner / person responsible for the store)
Last Name (last name of the store owner / person responsible for the store)
Company (the company name is displayed at the top of your store - if you have uploaded a logo, it will replace the company name at the top)
Country and Address (your country and address)
Notification email (this is the email address to which the email notifications like the ones for new orders will be sent, by default this email is the same as the email provided during the registration)
Currency (the currency displayed on the store, the list of supported currencies can be set by the administrator)
Logo (the logo, which will be displayed on your store)
2.2. Store packages
With PHP Mall it's possible to have various store hosting packages (free or paid) with different different number of maximum allowed products for each of them. When you sign up as vendor you could choose for your store one of these packages created by the administrator. It's possible also to switch between the different packages later from your admin panel and the Home → Package page.
In order to illustrate how the packages work, let's consider that on the mall website there are two packages the first one called Basic with 10 allowed products and free of charge and a second one Premium allowing 1000 products maximum with price $10.00 paid every 3 months
When a new vendor sings up he could choose between:
1) Basic - since this package is free the website / store will be instantly activated and the user will be able to start using his website immediately and log in directly in his admin space
2) Premium - in this case the website will be created (no other user will be able to sign up with the same user name) but it will not be active until the user payment is received:
- if the user has chosen to pay with PayPal, his website will be instantly activated when the corresponding PayPal IPN for the payment is received, if for any reason the payment fails, his website will be activated but the Basic package will be set for this website (not the Premium one, and it will be possible to upgrade the package later from the admin panel)
- if a user chooses to pay with cheque or money order, his website will be activated as soon as his cheque/money order is received and validated from the back office by the administrator
If a vendor reaches the limit of maximum products allowed for his package, the page allowing him to add new products to its store will be deactivated. The user should in such case either delete any of his products or upgrade his package with a new one providing more space.
You can upgrade your current package from the Home → Package page in the admin panel. The new selected package will be activated as soon as the payment for the new package is confirmed (based on IPN for PayPal or manually by the administrator from the main admin panel).
2.3. Changing your password and log in report
You may change your password at any time from the Home->Change password page. To change the password, you need to enter your current password and enter and confirm the new one. When the new password is changed successfully, you'll be asked to log in again using your new password.
3. Products management
The Products management functionality in your admin panel allows you create categories, add products in them, set selected products as featured, create shipping zones and costs associated with them, define taxes and manage the product reviews submitted by the customers.
Clicking on Products and Categories will take you to the page that allows you to add new categories, or edit or delete the products you already have.
Clicking on Products and products will take you to the page that will allow you to add new products or edit the ones you already have.
Clicking on Products and Shipping zones takes you to a page that allows you to create pre determined shipping zones so that when a customer enters there address it will automatically add shipping cost for the address they entered.
Clicking on Products and Shipping Costs will take you to the page where you enter the cost for shipping to the zones you created in the previous step.
3.1. Product categories
To add a new category, you need to enter its name and select the type of category Main Category or a sub category of an existing category. The sub categories appear as sub menus on your store when pointing the mouse over the main category.
The list of categories on your store appear as a tree on the Categories page showing their structure (the sub categories of a main category show with an indent). For every category in the list there are 4 icons allowing to:
Modify the category (its name and description)
Deactivate the category (the categories which aren't active, don't show up on your store)
Delete the category (which will remove the category and all products in it)
Edit the products in this category
At the bottom of this page, you may find also a menu allowing you to modify the hierarchy of the categories, for example make a sub category a main category etc.
3.2. Products management
The Products page in the admin panel shows a list of all the categories and their products. If you click on the name of a category on this page, this will show the form for adding new products in this category and also a list of the current products in this category. If you click on the name of a product, this will load the page for modifying the product information.
At the top right corner of this page, you may also find a link allowing you to import or export the products in .CSV files.
When you click on the name of a category, you'll see the list of products in this category and also the form for adding new products in the category with the following fields:
Name (name of the product)
Global category (these are the main mall categories defined by the administrator, which allow the visitors of the main website to browse all the products on the mall)
Short description (the short product description shown in the middle result)
Long description (the long description shown on the product details page)
Image (the main image the product and you also have the possibility to select the number of additional images and upload them the maximum number of images per product is set by the administrator)
Price (the price in the currency you selected for your store)
Manufacturer (the manufacturer of the product, if you would like it to be displayed on the product details page)
Weight (the weight of the product, which is used if you have defined shipping zones and shipping costs, in order to calculate the shipping cost)
Maximum items (if stock management is enabled, this field changes to Available items, so you could enter in it the number of items you have for this product; by default in it, you can enter the maximum number of items that can be purchased for this product)
Handling fee (if you enter a handling fee, it will be added the order total if this product is purchased)
Rank (the products with higher integer rank show up at the first position in the search results on your store, so you may use this field to sort the products on your store)
Points (if you use the customer loyalty program for your customers, in this field you can enter the number of points your customers will earn when purchasing this product)
Price in Points (the number of points for which this product can be purchased if the customer loyalty program is enabled)
Active (if set to NO, the product will not show up on your store, you can include it later by setting Active to YES)
Download link (if you enter a value in this field, the product will be considered as digital good for digital goods on successful payment with Paypal, the system sends an email to the customer with the download link in order that they can download the product)
3.3. Product options
The Product Options feature allows you to create different options for the products you sell. For example if you create a new product Shirt with the Product Options you can create different options and pricing for this product, for example:
Size S, $14.90
Size M, $16.90
Size L and XL, $19.90
etc.
The different product options show up after in a drop down menu on the product details page with which the customer can choose the option for the product he prefers to order.
3.4. Making a product featured
The featured products show up on the home page of your store. To make a product featured, you need to go to the Products → Featured Products page in the admin panel and there click on the name of the product you would like to make featured. The name of the product will become then colored in red (this is showing that the product is currently marked as featured).
To cancel a product being featured, you could just click again on its name the product name will become written again with normal font and the product won't be featured anymore.
3.5. Shipping zones and shipping costs
The Shipping Zones and Shipping Costs features and pages in the admin space allow you to define your own shipping zones and shipping costs associated with them. To create a new shipping zone, you can select between one or many different states or countries. The shipping cost will apply only if the customer address is in the same shipping zone (by default you can create as many different shipping zones you prefer).
When you have created the shipping zones you wish, you can add then the shipping costs associated with them. For one shipping zone you can create as many shipping costs you prefer, for example:
Zone: Alabama, Weight: 5 pounds (or kg, the unit needs to be the same as the one you used when entering the products data), Cost $2
Zone: Alabama, Weight: 20 pounds, Cost $5
Zone: Alabama, Weight; 50 pounds, Cost $15
This will mean that if a customer in Alabama places an order with a total product weight <= 5 pounds, the shipping cost will be $2, if the total weight is between 5 and 20 pounds, then the next shipping cost of $5 will apply etc.
If the weight is over 50 pounds, then the maximum shipping cost will apply, $15.
Please note you can limit also the maximum weight by limiting the number of items, which can be purchased for a selected product (so if there is no possibility to ship orders over some weight, you could limit the number of items that can be purchased for heavy products).
3.6. Taxes
With the Taxes functionality you can set different taxes to be charged for the different tax regions (countries) and the different product categories. For example if you are selling both books and mobile computers on your store, you can set different taxes for the books and the mobile computers.
The tax regions can be set and updated by the administrator, so they can be set depending on which part of the world the website is operating.
For customers in the European Union, there is also a special tax region called European Union, which includes all the countries in the European Union. So if you have a VAT registered company in the EU, you can define such tax for the EU customers and if a customer is a natural person without VAT registration (there is a VAT field during the checkout), then VAT will be charged on his purchase (which is the common practice in the EU according to the tax regulation).
3.7. Product reviews
The Product Reviews functionality let the users of your store or the main mall website write reviews for your products. From the Product → Reviews page you can see the list of the reviews posted and also select a particular product from the ones you have allowing you to see the reviews for this product only.
The latest reviews show up also on the dashboard (on the home page of your admin panel).
4. Orders management
4.1. Orders approval
You can see the new orders and approve them on the Orders → Approve page. When you reject an order, you can click on the Reject link and enter the reason for that (like for example item not available etc.) and the rejected orders will appear after that on the Orders → Rejected page.
The Orders → Approved page shows a list of the approved orders, while on the Orders → Full List page you can see a list of all the orders placed on your store and search by amount, order id, status etc. in them.
4.2. Customer loyalty program
Using the customer loyalty program you can let your customers earn points when they purchase your products. You can enter the number of points when creating or modifying a product, in the Points field.
The customers can spend after that these points, to purchase with points another products from the ones you offer, so in this way you can give free products to customers who have purchased a number of other products. To allow the customers to purchase with points a product from yours, you need to enter a value in the field Price in points when adding or modifying a product.
5. Store settings
5.1. Payment settings
The Settings → Payment Settings page let you choose the payment options you would like to accept on your store. To enable a selected payment option on your store for example PayPal, you need to check the check box for it and your your registered PayPal email address (or depending on the selected option, the other required information for it).
Four other settings are available also at the bottom of the page and can be modified there:
Order success message (the message which will be displayed to the customer when they have successfully placed an order)
Use PayPal IPN for digital products (if you set it to YES, then the PayPal's IPN instant payment notifications will be used when a customer purchases a digital good, on successful payment the system will email the customer the download link to download the product)
Digital products download email - Subject and Digital products download email Text (the format of the email messages, which will be sent to the customers when purchasing digital products)
5.2. Invoices settings
You may use the Invoice Settings page to change some general settings for the invoices (like the Company name and address, the footer information, the invoice start number etc.), which can be downloaded from the Approved Orders page.
5.3. Website style
From the Settings → Website Styles page you can change some general website style settings such as the default font color, the default links color etc. If the first field on this page "Disable these styles" is set to YES, the styles set on this page won't apply for the website.
5.4. Products, menu and search settings
On the Settings → Products page in the admin panel, you could specify the number of products per page (and also number of products in a row) you would like to show up on your store when browsing a product category or making a search.
Using the Settings → Menu Settings page, you could change the colors (font color, background color etc.) and also the font size and font family for the products menu (the one displayed on your store allowing your customers to browse your products and categories).
PHP Mall offers you the possibility to define which of the basic product fields on your store will be search-able. By default the fields in which the website visitors and customers could search are the product name, short and long descriptions. In order to deactivate for example the search in the product's long description you need to uncheck the correspondent check box for the search fields on the Settings → Search page.
6. Website structure and content management
6.1. Managing the structure and content of the pages of your website
The pages in the Website category allow you to manage your store / website pages, add new or remove the existing ones or edit their content, manage the style of the main navigation menu and also add news on your store.
With the 4 icons at the top, you could:
edit the content of a page (by dragging the first, edit icon over the page you would like to modify)
change the page settings of a page (including its title, meta description, keywords and others)
delete a page (by dragging the delete icon, the 3rd from the 4 at the top)
preview a page (opens the page in the browser)
For example to delete a page, please drag and drop the Delete icon over the page you would like to be deleted. A prompt window will show up asking to confirm your action and clicking on OK will remove the page from your website.
To add a new page to your website, you need to drag one of the 6 icons to the left. To add a new empty page, you need to use the first icon, the other icons will add some predefined content, which you may edit after that with the WYSIWYG pages editor.
6.2. Changing the style of your website main navigation menu
There are two types of possible website navigation menus:
-Standard (these menus are generated automatically according to the website structure defined by you - they are multilevel and you can customize their colors and appearance from the Website → Navigation Menu by clicking on Standard - Settings)
- Customized (it's possible with them to enter a custom template which will be used for every item in the menu)
The customized menus offers better flexibility since the menu item HTML template can be customized completely by directly modifying its code, so these customized menus can be used when more complex templates have to be integrated.
The Settings page allow to modify the settings of the standard menu and also the color settings of the sub menus for the customized menu.
If Customized menu is currently set for your store, you can see its template HTML code and modify it from the Customized Menu → Settings page.
Please note that when selecting a new template for your store from the Templates → Select a template page, this will set the necessary menu settings, so you could use these settings only if you wish to create your own custom template or customize the default ones.
6.3. Adding news on your website
The news show up in a special section News on your website. To add news on your website, you could use the Website → News page in the admin panel.
For every news you add, you need to enter:
Title (the title of the news)
Content (the content the news, which you can also format using the WYSIWYG editor available on the News page)
Active (with possible values YES or NO specify if the news is active, the news which are set as not active will not show up on your website)
7. Templates
7.1. Selecting a different predefined template for your store
To select a different predefined template for your store, you need to go to the Templates → Select a template page in the admin space and there click on the screen shot of the template you would like to set it on your store.
7.2. Editing the HTML code of your template
The admin panel offers functionality to edit directly the HTML code of your template, which may be necessary if you would like to insert in your template your own HTML elements (like HTML advertisements etc.)
To do this, you need to go to the Templates → Modify page and click on the Modify icon for your current template.
7.3. Product categories menu template
On the Categories Menu page in the admin panel, you have the possibility to modify the template used for the product categories menu. This menu template is different for every main store template and you may consider modifying it only if you wish to make some more advanced customizations of your store template, requiring modifications of the products menu layout.
Please note that if you make a mistake when modifying this menu, you can always restore the default one by simply resetting your store template (from Templates → Select a template, choose the same template of your store), since setting a new main template resets also all the sub templates like the product categories template.
8. Tools and statistics
8.1. Adding new forms
You can use the functionality to create custom server side forms on your website / store in order to add web forms like contact forms or feedback forms or any other type of form you prefer. You are free to add the fields you prefer in the forms you create and format them in the way you wish.
To add a new form on your website, please go to the Tools → Create a new form page, enter the form name and click on Continue. On the next screen, the form for adding fields will show you you can choose between text boxes, text areas (for bigger text input), combo boxes, check boxes and radio button. For every field you need to enter its name, the size in pixels you prefer and for the combo boxes, check boxes and radio buttons also the possible values, which will show up to the user to select from.
For the text boxes and text areas, you also have the option to make these fields mandatory and enter the message, which will be shown to the user if he doesn't fill a value in this field.
For the new forms you create, you can also specify the text on the submit button and the message, which will show up to the user when the form is submitted successfully.
You can see the data when the form is submitted on the Posted Data page and it will be sent also to the email address you entered in the field Email address to which to send the forms data when creating the form. Please note that you could change this email address at any time from the Manage the forms page by clicking on the Modify for the selected form.
8.2. Publishing the forms on a page
You can see the list of the custom server side forms created by you on the Manage the forms page. To publish a form on a selected page, please change the value of the drop down menu Page of the form to the page on which you would like the form to show up and click on Save to save the changes.
On the same page for every form you may find also the following icons:
Delete (allowing to delete the form)
Settings (you may change with it the basic settings like the form name, the submit button text, the message displayed to the user on successful submission and the email address to which the forms data will be sent)
Modify (allowing to modify the form)
Copy (with this feature you may create a copy of a form, it can be useful if for example you wish to copy the same form on other pages or save a backup of a current form)
8.3. Website statistics and referrals
There are 3 pages in the admin space providing quick information for the page visits, the referrals and allowing to submit the pages of your website to Google:
Reports (you can select a period for which you may see the unique visits and the page reloads)
Referrals (shows the referrals to your website visits coming from other website links)
Submit to Google (offering basic functionality to submit selected pages of your website to Google)
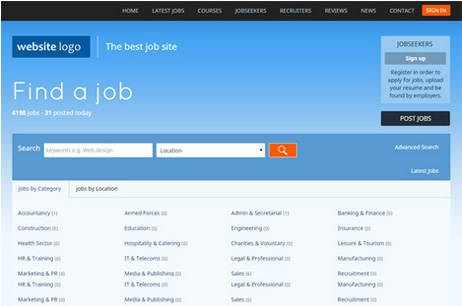
Jobs Portal - Launch easily an online job board with multiple features for the job seekers and employers
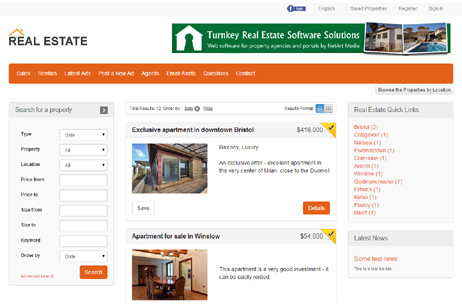
Real Estate Portal - Create an advanced multi-user real estate classifieds website
PHP Mall - Create a multi-vendor online mall allowing the users to sell easily online

Event Portal - Mobile-friendly and multi-user event listing and ticket selling web solution
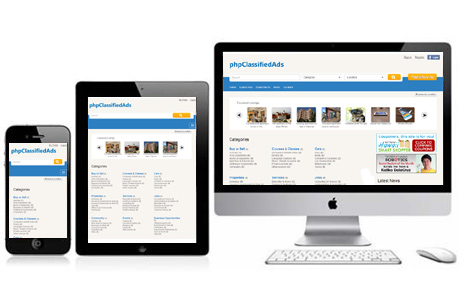
PHP Classified Ads - Add a classifieds section to your site or make a standalone online classified portal

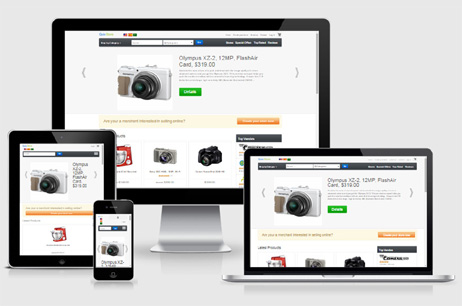
PHP Store - Build an advanced online store and sell your products with ease
WS Creator - Multi-user automatic website creation and management web solution
PHP Dating Site - Create an advanced online dating or professionals search website
Deals Portal - Launch a multi-user deals and coupon sharing website
Blog System - Make a blog hosting site or add a multi-user blogs section to your current site
PHP Support Desk - Add a modern help desk system to offer better support to your customers