Connect a custom domain
With a plan that includes the custom domain feature, your blog can live at your own address such as myblog.com.
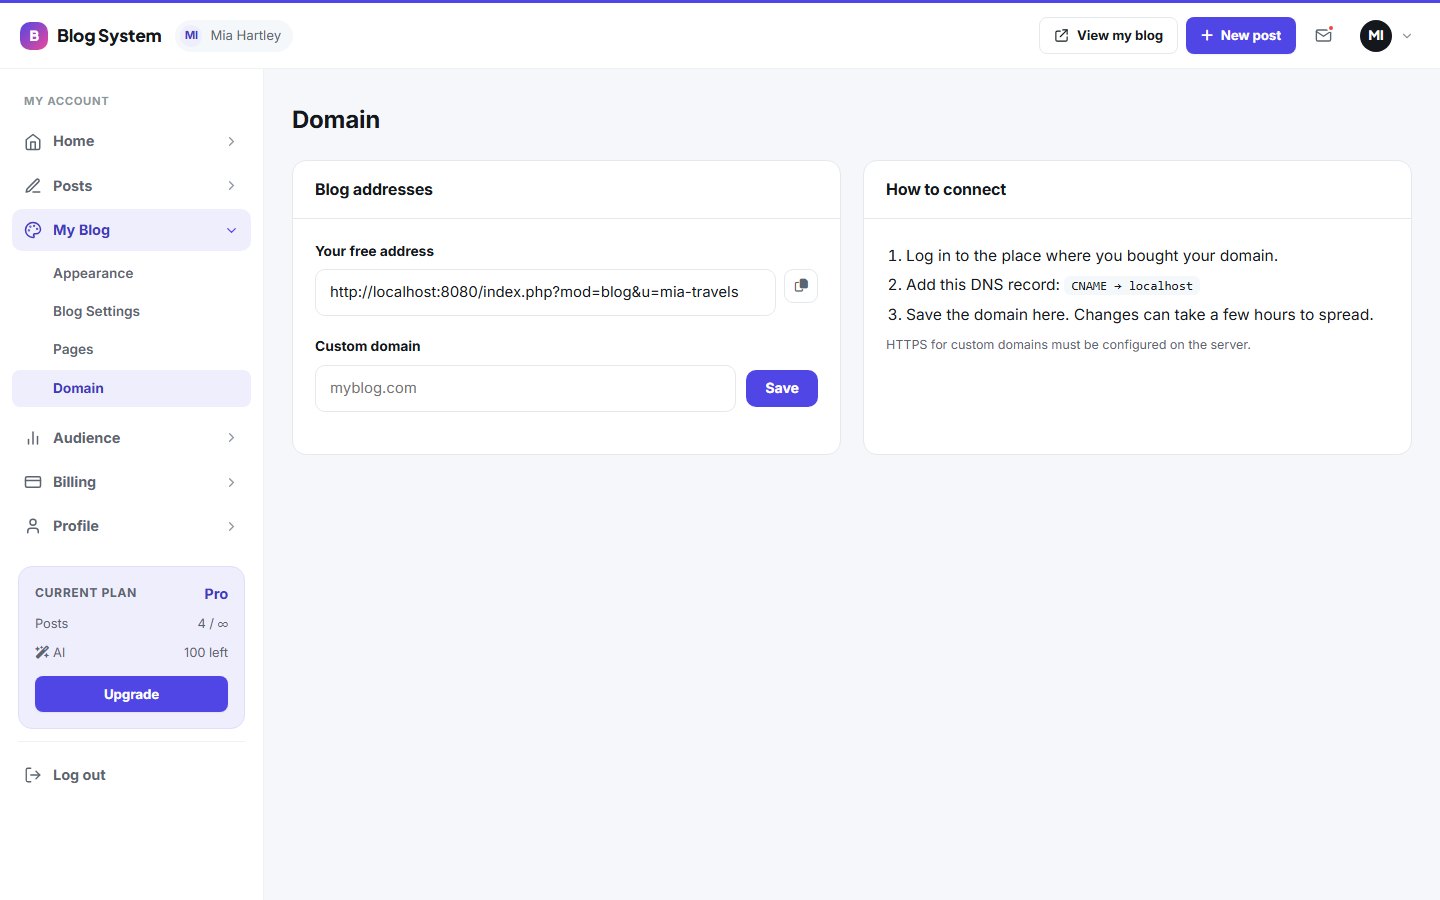
Steps
- Buy a domain at any registrar.
- Open My blog › Domain and enter the domain, for example
myblog.com(withouthttps://and withoutwww). Save. - At your registrar create a DNS record: either a
CNAMEto the platform's main host or anArecord to the server IP shown on the page. - Wait for DNS to update, which can take up to a few hours. The status changes from Pending DNS to Active.
Removing a domain
Use the Remove domain button. Your blog stays available at its free address.
No access?If the page says your plan does not include a custom domain, use the Upgrade link. See Plans and payments.
For the platform owner's side (subdomains, certificates) see Blog addresses.
Last updated